A Look at First Floor Construction
As A Home Builder
As a home builder we are at the first floor stage of our new home.
There are two basic types of floors: slab made from concrete and wood framed floors.
There are of course, different methods to achieving each type, but we will look at the basic principles involved.
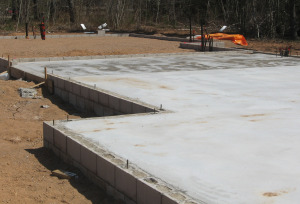
Lets first look at a slab type first floor.
Before the concrete is poured to form the slab, there is a lot of planning and prep work a home builder must do.
The planning for a first floor slab starts at the footings. Here the excavation for the footings are trenched leaving the interior soil undisturbed .This means less fill need to be hauled in and compacted by the home builder.
After the footings are poured and foundation walls are up,drains and sewer lines are laid. Insulation is placed on inside of foundation walls and in some cases, placed on the outside of the walls to a depth of at least 2 ft. This is a must... if you are going to have a heated slab.
The next step is to fill in the inside area of the foundation wall with a good compactable fill,leaving enough room for at least 6 in. of gravel,2in.for styrofoam insulation and the thickness of the concrete floor.
It is important that all areas are compacted well.
If the compactor you are using is a smaller size,then add 6 to 8 in. Of fill at a time, to insure you get a good compaction of the fill. The larger the compactor the more fill that can be compacted at one time.
When doing the compaction for my slab, I rented a plate compactor and a foot compactor for around the foundation.
A tractor with a bucket was used to place the fill to be compacted.
Now that the fill has been compacted and the 6 in. of gravel has been added and graded, the rough plumbing can be done....drains for sinks,showers,bathtubs, toilets..etc.
Cold water lines can be laid at this time as well...but not hot water lines.Hot water lines should be laid on top of the insulation where the temperature will be warmer.
Before putting down the styrofoam insulation,a vapor barrier must be put down to prevent moisture from coming up from the ground.
Once the insulation is in place, the domestic hot water lines can be laid.
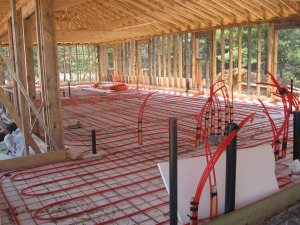
Heating pipes would be laid at this time,
if in-floor heat is part of your plan.
The actual pouring of the floors can be done at this time or in some cases poured after the roof is on .
Time of year and weather conditions play a big role in this decision and you as the home builder will make the call.
If a basement or a crawlspace is part of your plans, than a wood constructed first floor will be the method used.
Whether the home builder is planning on a full basement,a crawlspace or a raised entrance, the principles are the same.
First a sill plate, with a gasket seal, is bolted to the top of the foundation wall. The location of the floor joist can be marked on the sill plate.
The distance between the floor joist will be determined by the size and length of the joist.
Example of this would be....assuming a live load of 40 lb. per sq ft..a 2x8 spaced at 12" can span a distance of 12' 10", if spaced at 16 in.the span would be 11'4". A 2x10 joist spaced at 12 in. can span a distance of 16'5" .
If spaced at 16 in. the maximum span would be 14'6".
Your building plans will specify the material for your floor joist and the distance they should be placed.
The next step would be to place a rim joist...( sometimes called a header joist) on top of the sill plate, around the perimeter of the foundation. The floor joist will be fastened to the rim joist by nailing through the rim joist into the end of the floor joist and fastened to the sill plate by nailing on an angle(toe nailing) into the sill.
Where wide spans are encountered, a beam or load bearing partitions are installed to carry the floor joist.
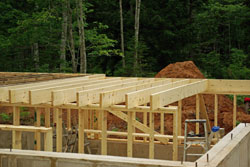
The picture on the right, is a example of a center partition being used to support floor joists.
To prevent floor joist from twisting, restraints should be put in place .This can be accomplished by nailing to the underside of the floor joist, a continues 1x4 strapping, at 7 ft intervals.
Blocking cut to fit between the floor joist or 1x3 bridging cut at an angle to fit diagonally between the floor joist and nailed at both ends are other alternatives.
.
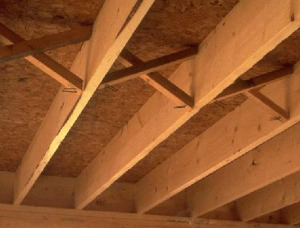 The picture to the left, shows a example of bridging.
You will notice the nails on the lower side of the bridging are left out.This is to allow for some settling or straightening of the floor to occur before the bridging is fastened securely.
Common sub floor material are 4x8 sheets of plywood or osb board. These sheets are made with a tung along one edge and a grove along the other edge.This allows for support between the floor joists.
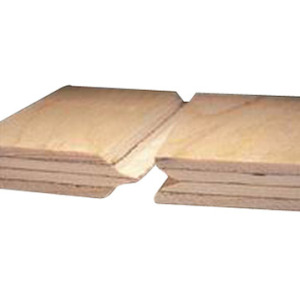 If plywood or osb board is used that does not have tung and grove configuration, then blocking should be installed between the floor joists where edges meet and the end joints should be staggered .
These sheets are glued (with a construction adhesive,such as PL 400) and screwed to the floor joist.
The methods I have described above are with conventional materials. I should note at this time there are other manufactured floor joist systems available and are capable of spanning larger distances than conventional lumber.
Although these systems deserve a look,you will probably find they will be a more expensive alternative and as a d.i.y. home builder the bottom line is important
Top of Page
Return from Home Builder First Floor toSteps to Building AHome
Return from Home Builder First Floor to Home Page